
In the previous post, we mapped the authentication landscape. Now we move from architecture to implementation. This post shows you how to connect to Dataverse using modern .NET patterns with the recommended client:
Microsoft.PowerPlatform.Dataverse.Client.ServiceClient
If you’re building:
- Console apps
- Migration utilities
- Admin tools
- DevOps automation
- Internal utilities
- XrmToolBox-style plugins
This is your starting point.
Why ServiceClient?
Microsoft’s recommended .NET SDK for Dataverse is provided via:
Microsoft.PowerPlatform.Dataverse.Client
At its core:
Step 1: App Registration (Entra ID)
Before writing code, you must register an application in Microsoft Entra ID.
Required configuration
- Create an App Registration.
- Add a redirect URI:
http://localhost(for console tools)
- Under API permissions:
- Add delegated permission to Dataverse:
user_impersonation
- Add delegated permission to Dataverse:
- Grant admin consent (if required).
Keep note of:
- Application (Client) ID
- Tenant ID
- Redirect URI
Step 2: Install NuGet Package
dotnet add package Microsoft.PowerPlatform.Dataverse.Client
Step 3: Basic OAuth Delegated Connection
This is the most common developer scenario — interactive login.
using Microsoft.PowerPlatform.Dataverse.Client;
using Microsoft.Xrm.Sdk;
using Microsoft.Xrm.Sdk.Query;
using System;

class Program
{
    static void Main()
    {
        string connectionString =
            "AuthType=OAuth;" +
            "Url=https://yourorg.crm.dynamics.com/;" +
            "ClientId=YOUR-APP-ID;" +
            "RedirectUri=http://localhost;" +
            "LoginPrompt=Auto;";

        using var service = new ServiceClient(connectionString);

        if (!service.IsReady)
        {
            Console.WriteLine(service.LastError);
            return;
        }

        Console.WriteLine("Connected successfully.");

        QueryExpression query = new QueryExpression("account")
        {
            ColumnSet = new ColumnSet("accountid", "name"),
            TopCount = 5
        };

        var results = service.RetrieveMultiple(query);

        foreach (var entity in results.Entities)
        {
            Console.WriteLine($"{entity.Id} - {entity.GetAttributeValue<string>("name")}");
        }
    }
}
What’s Actually Happening Behind the Scenes?
When this runs:
- ServiceClient detects
AuthType=OAuth. - It launches OAuth flow.
- User signs in.
- Access token is issued for Dataverse.
- Token is cached.
- Token refresh is handled automatically.
- SDK operations call Web API endpoints internally.
Important:
You are not using SOAP.
You are not manually managing tokens.
You are not crafting HTTP headers.
The SDK wraps all of that.
Understanding the Connection String
Let’s break down what matters:
AuthType=OAuth;
Url=https://yourorg.crm.dynamics.com/;
ClientId=YOUR-APP-ID;
RedirectUri=http://localhost;
LoginPrompt=Auto;

Step 4: Creating Records
Let’s move beyond read operations.
Entity account = new Entity("account");
account["name"] = "ServiceClient Test Account";

Guid accountId = service.Create(account);

Console.WriteLine($"Created account: {accountId}");
Dataverse security is enforced exactly as if the user performed this inside the UI.
Step 5: Updating Records
Entity updateAccount = new Entity("account", accountId);
updateAccount["name"] = "Updated via ServiceClient";

service.Update(updateAccount);
Step 6: Deleting Records
service.Delete("account", accountId);
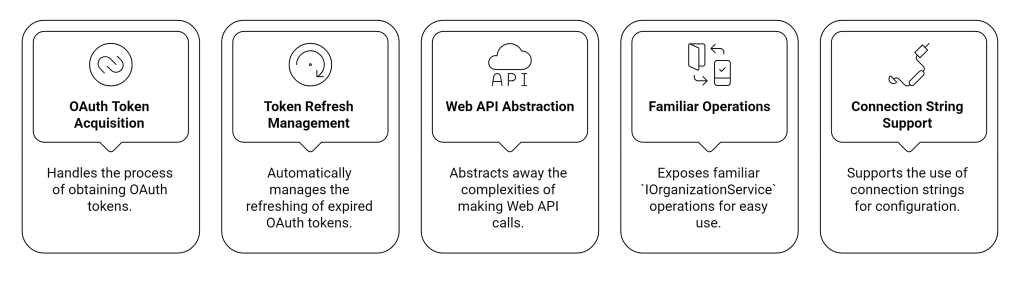
Token Lifecycle (What You Don’t See)
ServiceClient handles:
- Access token acquisition
- Refresh token storage
- Expiry detection
- Silent renewal
- Thread-safe reuse
This is why you should avoid manually calling Web API unless necessary.
Using Client Secret Instead (Non-Interactive)
If you want to eliminate login prompts, use Client Secret authentication. This becomes Server-to-Server, which we’ll fully cover in Part 3.
Example:
string connectionString =
    "AuthType=ClientSecret;" +
    "Url=https://yourorg.crm.dynamics.com/;" +
    "ClientId=YOUR-APP-ID;" +
    "ClientSecret=YOUR-SECRET;";
This requires:
- Application permissions
- Application User created in Dataverse
- Security roles assigned
No login prompt. No user context.
