
Dataverse SharePoint integration is a must in all the project nowadays. Online makes it more feasible and quick to enable the integration between these two applications. This being said when the integration is tuned on the folder naming convention is out of our control using the base configuration.
The introduction of Power Automate really elevate in customising the extra steps easy with no code approach. Though we can do things with Power Automate, the asynchronous call makes some of the implementation bit tricky. The document location creation of the SharePoint integration is one of it.
In Dataverse once a record is created, the folders won’t be created immediately, only when we move the documents section the trigger is on and the document location and folder will be created. This a blessing and a curse on itself. The bless is that we can bypass the automate creation easily but the curse is that, if we got a custom implementation we need to bypass before the user navigate to the document section.
There are multiple ways to skin a cat, likewise this custom implementation also can be done with many ways. In this article I am trying to discuss those possible ways to pull off this problem.
Solution 1:
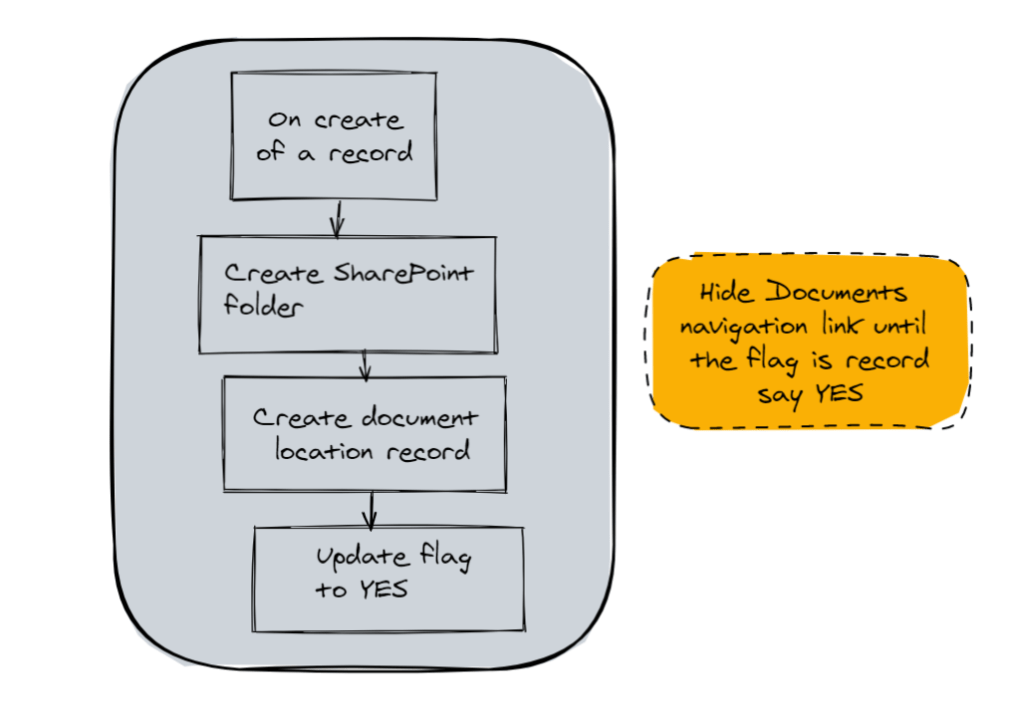
Based on the below diagram create a Power Automate flow to create SharePoint folder and Document Location record in Dataverse on create of the record. You can make use of the context information to customise the folder name and everything. The tricky part is to hide the documents navigation link until the flow get completed. This way we can bypass the default document location process. The document navigation link can be show/hide using below code piece.
formContext.ui.navigation.items.getByName(“navSPDocuments”).setVisible(visibility)

Caution: This is not a supported code
Solution 2:
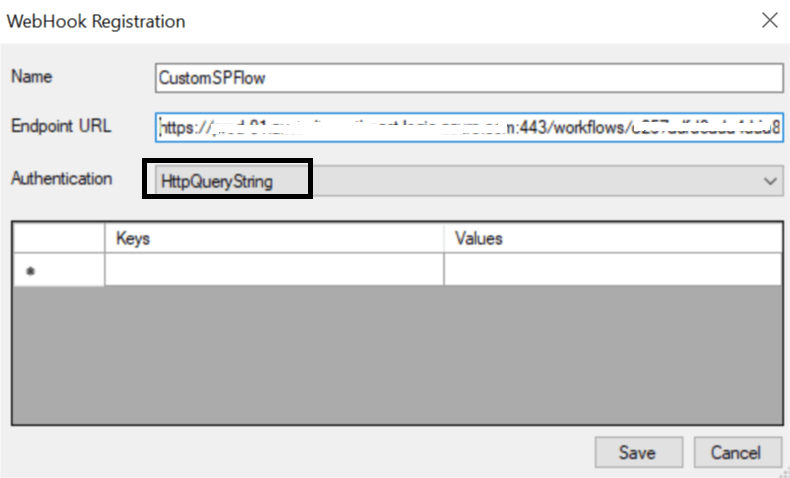
This is a synchronous method using web hooks. The steps for the Power Automate flow remains the same as above but instead of using the automated cloud flow use the instant cloud flow, basically the trigger will be changed to “When a HTTP request is received“.
Once the flow is ready, register the flow URL as a web hook in the plugin registration tool as below. Copy only the base URL in the Endpoint URL (https://{instance_domin}:443/workflows/c345asdasdada4dda84535da53454312b65/triggers/manual/paths/invoke).
Specify each query string one by one as per the URL you got.
api-version=2016-06-01
sp=/triggers/manual/run
sv=1.0
sig=HASH
After the web hook is setup, register a step with the below setup.
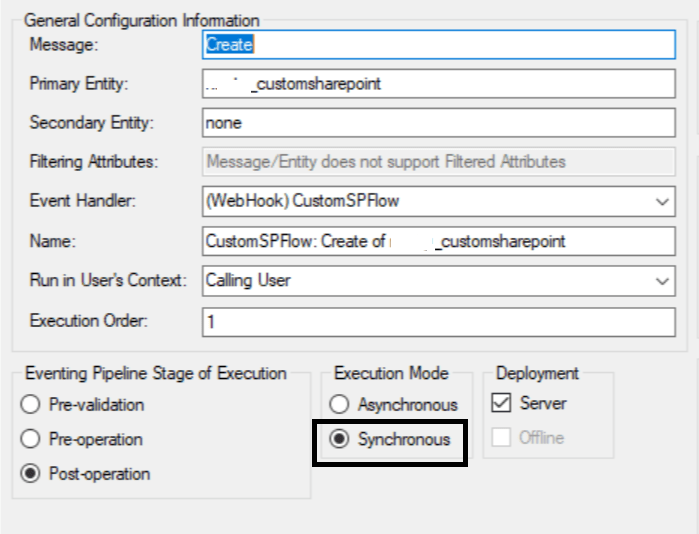
This will trigger the flow immediately once the record is created. The beauty of this implementation is that if you put a failure mechanism and send the response back, it will even rollback the creation process and also show error message on record creation. The one possible drawback is that when there is a change in the Power Automate the HTTP URL will change due to the versioning, the URL needs to be updated in the web hook registration.
